As a homeowner eager to sell your home to the right buyer, how can you prepare for a home inspection? As home inspectors, we often enter a house that just isn’t ready for us. Shelves are full of storage, blocking the attic access hatch in the closet. Appliances are full of clothes and dishes. And there is junk, junk, and more junk everywhere, blocking access to areas and systems of the home. When we can’t see it, we can’t inspect it.
As part of our Standards of Practice, we typically dislike moving personal effects, mainly for liability reasons. And you probably also wouldn’t appreciate us moving your unmentionables from the clothes washer! As a seller, preparing for a home inspection can help it go faster and leave the home inspection with fewer limitations. This way, you can signal to the buyer that you have nothing to hide.
Here are some easy things you can do:
-
Ensure we have access.
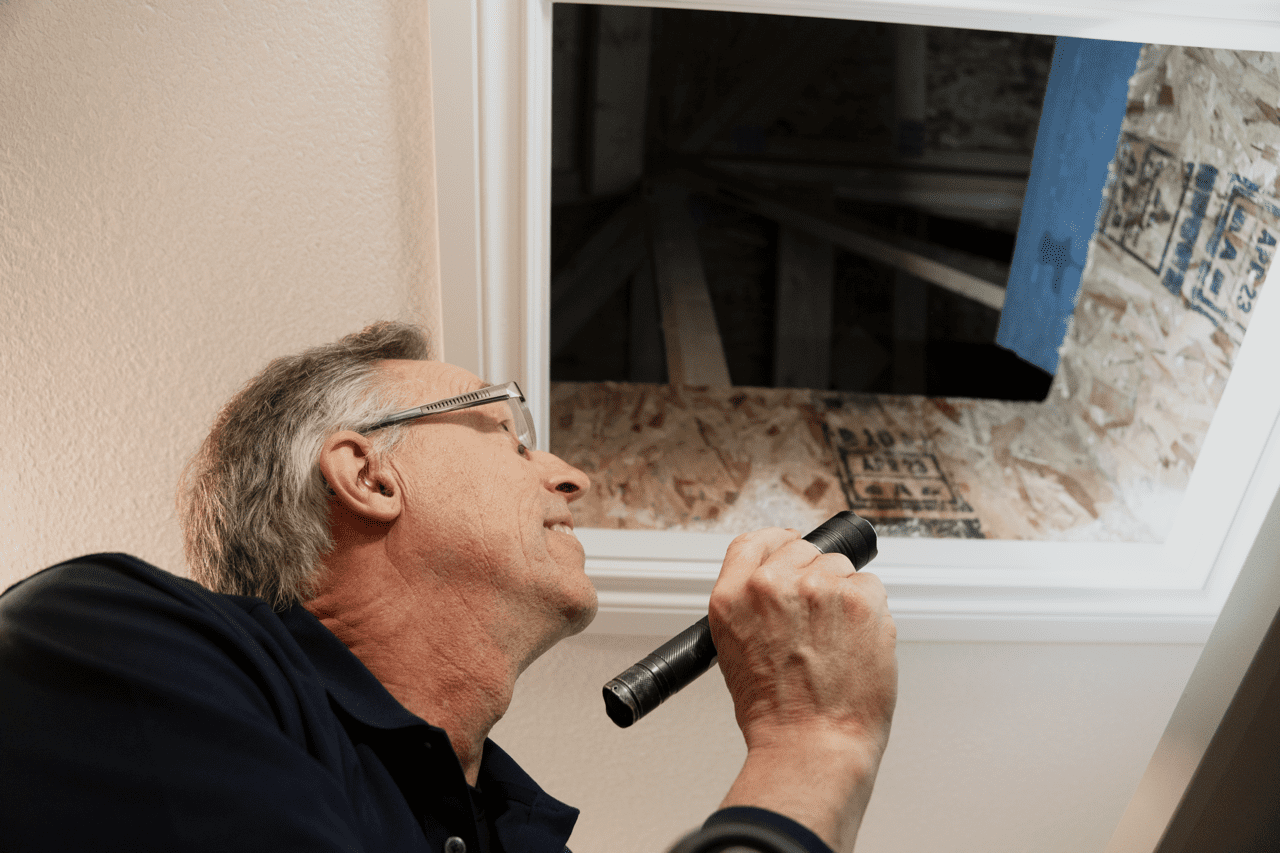
One of the most important things you can do to prepare for a home inspection is to ensure we have easy access throughout the property. If we can’t get to an area, we can’t inspect it, which might be a red flag for buyers. Clear away anything blocking access to places we must examine, including attics (remember the garage!), basements, crawlspaces, utilities, and under sinks.

-
Clear around the outside of the house.
In addition to checking the interior functionality of your home, we will also look at the exterior, including siding, trim, and caulking around windows and doors. You’ll want to leave areas around your home clear of plant growth, trash cans, and stored items so we can get a good look.
-
Check the roof
For most people, it’s been a while since they last looked at their house’s roof. The roof is integral to the home inspection, so you can’t ignore it when preparing. Get out a ladder and clean moss and debris from the gutters, check for damaged or missing shingles and ensure downspout extensions are in their proper position. If you find damage on the roof, you’ll want to get it taken care of before the home inspection. (WARNING: Go up the ladder against the house or onto the roof at your own risk. Don’t go up if you do not feel you can do it safely.)
-
Keep a clean house
If you’ve already been going through the process of selling your house, you’re probably used to keeping everything clean and tidy. When you’ve accepted an offer, you’re not done yet! Maintain the same level of cleanliness to prepare for a home inspection. How clean your home is doesn’t have anything to do with the inspection itself, but a dirty or messy house may make us suspicious that other areas of the property may not be adequately maintained.
-
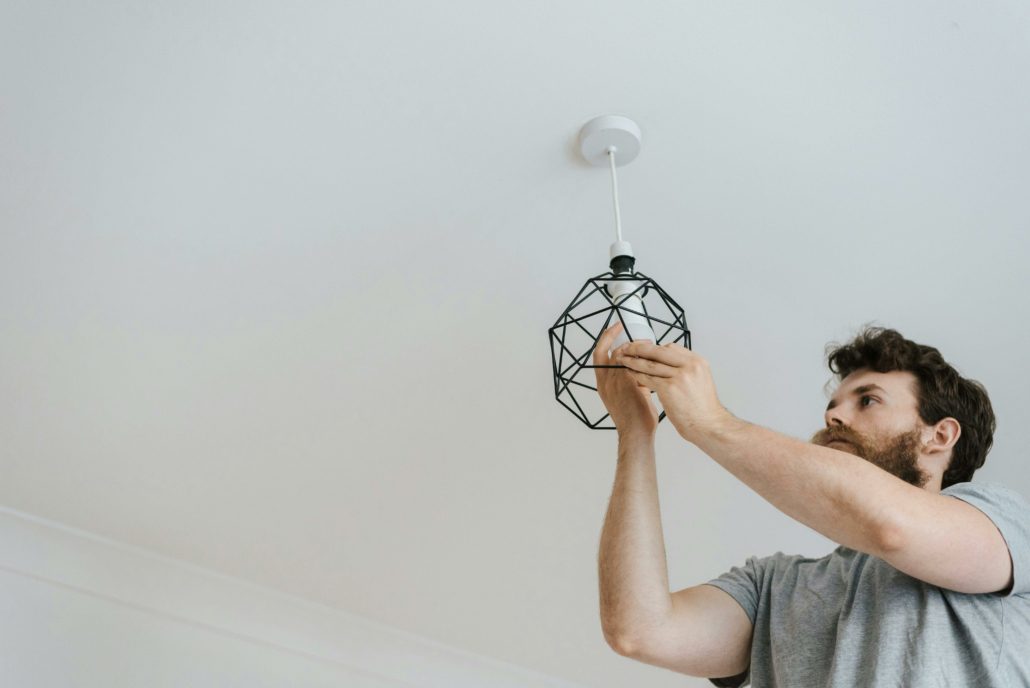
Replace any burned-out lightbulbs.
A light fixture that doesn’t work suggests one of two things to a home inspector: either the bulb is burned out or something faulty in the fixture’s wiring or with the fixture itself. We will either have to waste time determining if the fixture is inoperable, or we may note a possible defect without looking further into it. Avoid both scenarios by ensuring all of your bulbs are in working order.
-
Make sure your toilets are functioning correctly.
Your toilet running for a long time after it is flushed is a common problem that gets easy to ignore when you’re living with it every day. Fixing a running toilet is an easy and inexpensive repair you can take care of on your own with a simple trip to the hardware store, so take care of the problem before we find it.
-
Put in a fresh furnace return filter.
Regularly replacing the furnace filter in your home is essential for air quality and the overall well-being of your heating and ventilation system. Instead of making us concerned that you haven’t been taking good care of your home’s heating and air, clean or replace the existing filter and show that you pay attention to it.
(When you replace the filter, there may be an arrow on the new one. Make sure that the arrow is pointing toward the furnace. That’s the direction of airflow! Some filters are built with extra reinforcement on the backside so it doesn’t get sucked into the furnace.)
Furnace Filters 101: Understanding Types, Choosing the Right One, and Proper Maintenance
-
Turn all pilot lights on.
The pilot light for your water heater is probably always on (and you would have noticed already if it wasn’t), but make sure you also check the pilot light on your gas fireplace. Many people turn their gas fireplace pilot light off in warmer months, so it’s essential to double-check that the gas fireplace is working before inspection. If you’ve turned off your gas fireplace’s pilot light, now is the time to turn it on again.
-
Ensure the electrical panels are appropriately labelled.
A confusing electrical panel frustrates homeowners and home inspectors alike. Double-check that each switch in the panel is labelled clearly and correctly, and replace any labels that are incorrect or difficult to read. Ensure you address the main panel and any sub-panels (in the garage, etc.).
-
Check your doors.
Walk through your house and check each door and its hardware to ensure they work well. Interior and exterior doors should close, open, and latch without problems. Doorknobs should be securely in place, and any locks, particularly on outside doors, must function correctly. Sometimes, temperature fluctuations can warp otherwise functional doors and lead to problems, so check all doors, including those you don’t use very often.
-
Repair faulty cabinet doors.
It’s easy for the hinges on cabinets to get a bit loose, resulting in doors that don’t close correctly or aren’t flush with the frame. If you have a cabinet that looks off, you can fix it simply by tightening or adjusting the hinge with a screwdriver.
-
Take care of any insect intrusions.
Most homeowners have to deal with an ant or spider occasionally. Still, if you’ve got a wasp nest in the backyard or regularly see lines of ants in your kitchen or other interior areas, you’ll want to take care of these infestations when you prepare for a home inspection. Most bug problems aren’t a huge deal, but they can turn off buyers.

Things to do on the day of a home inspection
By the time this day comes around, you should have done everything you can to prepare for a home inspection. Now it’s time to make sure it goes as smoothly as possible:
- Keep or turn all of the utilities on. Ensure your utility payments are up-to-date.
- Double-check that you’ve left clear access to areas and systems all around the house.
- If any appliances are being sold with the house, make sure they are empty. Remove clothing from washers and dryers, dishes from dishwashers, and any storage inside the oven.
- Ensure kitchen and bathroom counters are clear, as well as in and under sinks.
- Unlock, or have keys available for any gates, garages, electrical boxes, or other areas that you normally keep secure.
- Prepare yourself and your family to vacate the house during the inspection. We will typically arrive about a half-hour early to get started on the exterior before we get let into the home at the scheduled appointment time.
- Take any pets with you, and if you can’t, make sure they’re safely crated or otherwise secured. We likely won’t inspect a room that has a barking dog loose in it.
If you follow these steps, you will leave your home all that much easier to inspect. We will have fewer stones unturned and leave the buyer with that much more trust and understanding of the home they are purchasing.
Check out everything we will inspect while we’re there at the Buyer’s Inspection.
If you have any questions about preparing for a home inspection, it’s easy to contact us! We’re happy to help.

